
High School Lacrosse Drills
274 drills for 15+ lacrosse players. Browse by skill focus and add them directly to your practice plan.
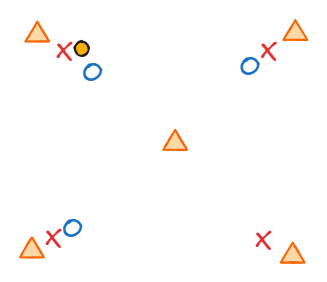
4v3 Box
Set up a 10x10yd box. 4 attackers and 3 defenders in. Have attack move the ball and maintain position while holding space so D can shift accordingly. A Focus: ball movement, outside hands, finding open girl D Focus: marking ball and adjacents, not going ball to ball, big stick and communication Variation: Add a cone in the middle that Attack has to get to by the open person/feed.
9-12, 12-14, 15+ · Stickwork, Team Defense
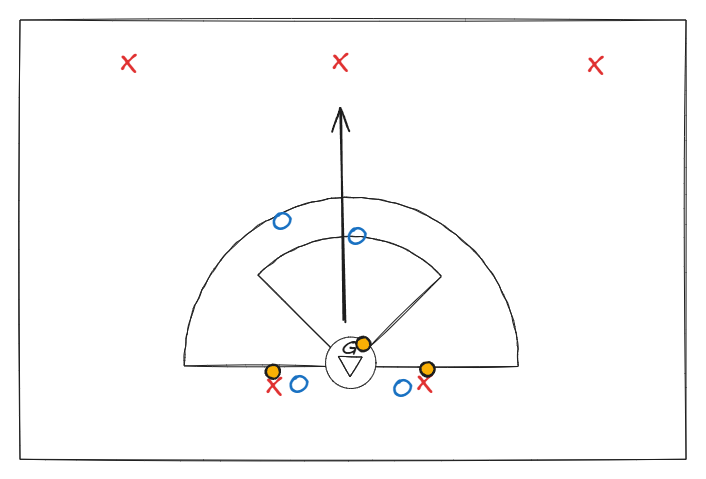
3v2 - 4v3 - 5v4
Ball #1: With goalie who clears up to any of the three attackers at the 30. They push a 3v2. Ball #2: Starts when Ball #1 is dead and then low player comes in with ball #2 Ball #3: Other low player comes in with ball Increase challenge: only score off feeds, certain number of passes
9-12, 12-14, 15+ · Transition, Competition
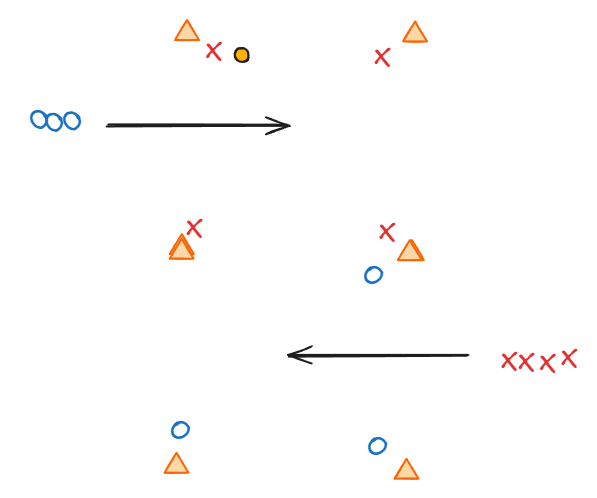
100 Pass Drill
Set up two boxes that share one side (change the size of the boxes depending on what you're working on or to challenge your players). 4 "Attackers" inside one box and a line of "defenders" waiting to go in. Can also be team 1 versus team 2 instead of straight defenders or straight attackers. Goal: X should be passing around. For every pass, a new defender comes in until its a 4v3. X should be counting passes. O wants to get a turnover or interception, if and when they do, O carries it to their box to be that 4th attacker on their side and they start passing around. Whole thing repeats until X gets a turnover/interception and then they pick up counting where they left off. Drill finishes when one team hits the # of passes.
9-12, 12-14, 15+ · Stickwork
Cone Footwork (5 Cone)
Linear Weave both sides (reps) Lateral Weave both sides (reps) Linear Weave both sides (speed) Lateral Weave both sides (speed) Step Overs d/b, sprint to finish - both sides Steps Overs down, linear weave back both sides Steps Overs down, lateral weave back both sides Linear Figure 0 both sides \Can always add the sprint to finish*
7-10, 9-12, 12-14, 15+
MR #1
Block 1: 100yd shuttle (50 back, :25s) - stand for recovery (:45s) 60yd shuttle (30 back, :10s) - stand for :15s) Block 2: Rest before starting is :10s 50yd sprint (:8s), jog back (:25s) 25yd sprint (:5s), jog back (:25s) Block 3: Rest before starting is :25s 100yd shuttle (50 back, :25s) - stand for recovery (:45s) 60yd shuttle (30 back, :10s) - stand for :15s) Block 4: Rest before starting is :10s 50yd sprint (:8s), jog back (:25s) 25yd sprint (:5s), jog back (:25s) Block 5: Rest before starting is :25s 100yd shuttle (50 back, :25s) - stand for recovery (:45s) 60yd shuttle (30 back, :10s) - stand for :15s)
9-12, 12-14, 15+ · Conditioning
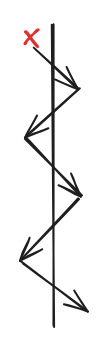
Walk The Line
Use a line as a guide to get your feet over focus on shorter first steps and explosive second step make sure to practice each spot
9-12, 12-14, 15+ · Goalie
Half Kneeling Skater Jump Saves
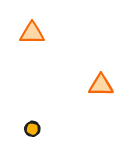
Kneeling leg is closest to the second cone Start kneeling, jump to the first cone, then jump to the ball Get stick down quickly (don't sweep) and bring your back foot with you
9-12, 12-14, 15+ · Conditioning, Stickwork
Defensive Box Drill
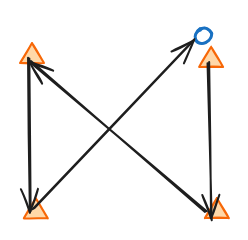
setup 4 cones in a box run up to the first cone and break down your feet run diagonally to the next cone (imitating a top drive) run out to the other cone, break down your feet run diagonally to the cone you started at focus on turning and running, not sliding
9-12, 12-14, 15+ · Conditioning, Defense (Individual)
Walk the Dog
This drill focuses on dodging and maintaining control of the ball while moving. Players will practice walking the dog by using their stick to cradle the ball while running. Progressions include: 1\. Setup: Start with players in a line, each with a ball. 2\. Execution: Players will run in a straight line while cradling the ball low by their ankles, focusing on keeping it secure. 3\. Progression 1: Add a defender to simulate pressure. 4\. Progression 2: Change direction while cradling to enhance agility. 5\. Progression 3: Isolate the wrist strength action by adding two sticks (one in each hand) working on getting the heads of your sticks to your ankles or behind them. Coaching Points: Emphasize keeping head up to maintain awareness of surroundings.
9-12, 12-14, 15+
Mid Z's
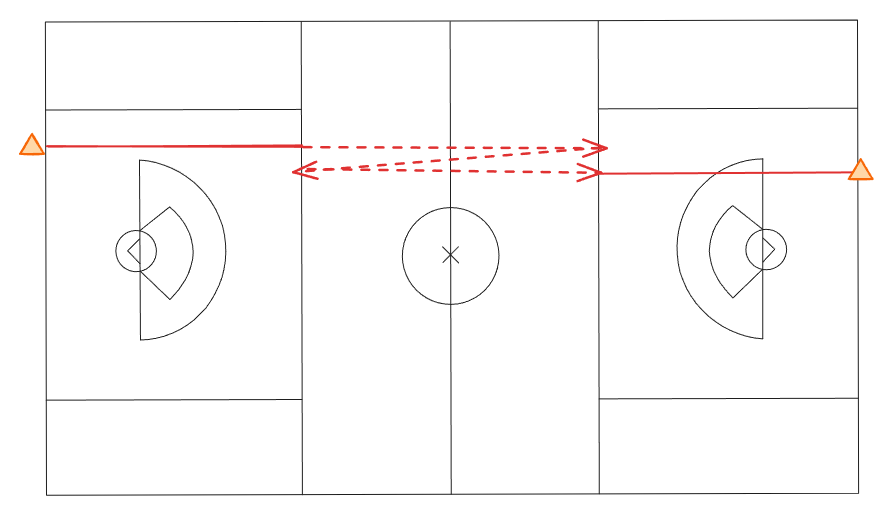
Start at one end of the field and build up speed before you hit the 30 yd line. By the time you hit the 30 you should be at your top speed. Continue at your top speed to the opposite 30, touch the line and come back to the first 30yd line and then touch the line and go all the way through the opposite 30. Gradually slow down once you cross the opposite 30 yd line and reset.
12-14, 15+ · Conditioning
3v2 Power & Crease Roll Shooting Drill
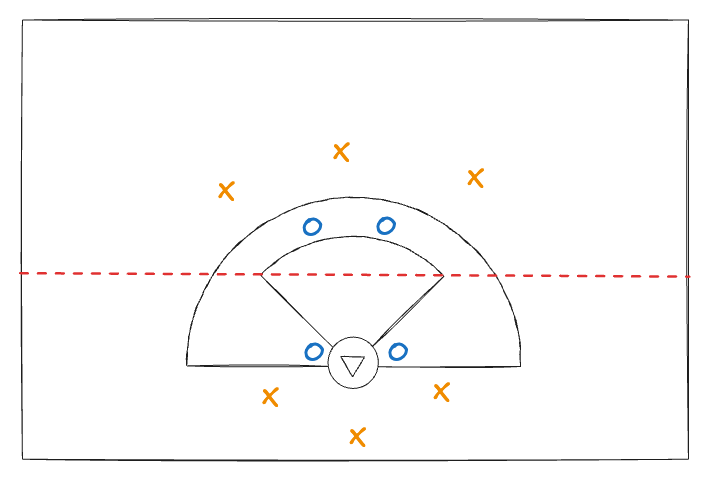
This drill is split in half (see the red line), and is two separate concepts divided by the line. Up top is a 3v2 in which a shot needs to be made through "power"then below the red line, the same group is in another 3v2 that is focusing on crease rolls.
15+ · Shooting, Team Defense
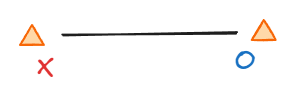
1-3-5-7-5-3-1
Set up two cones 10yds apart. You can also increase or decrease length depending on if you're focusing more on agility or conditioning. Partner up! The numbers (1,3,5,7) = how many lengths one person has. Start: X - 1 length (1 10yd sprint), the end where the O is. Then O copies X (1 10yd sprint). X then does 3 lengths (30 yds total) and then O copies. Works as a ladder so you build up to 7 and then go back down.
9-12, 12-14, 15+ · Conditioning